 Skip to content
Arlo Camera Setup & Installation Support
Setting up Arlo cameras involves a series of steps to ensure they are properly configured and functioning.
Here’s a simple and easy guide for Arlo camera setup:
Unboxing:
- Unbox your Arlo camera and accessories.
- Ensure you have all the necessary components, including the camera, base station (if applicable), batteries or power cables, and mounting hardware.
Power Source:
Arlo cameras are either battery-powered or wired. If your camera is battery-powered, insert the batteries into the camera.
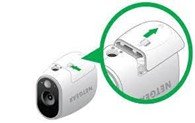
For wired cameras, connect the power cable.
Base Station Setup:
If you have a base station, connect it to your router using an Ethernet cable.
Power on the base station and wait for the LED indicators to show that it’s connected.
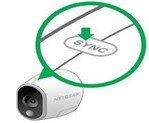
Sync Cameras with Base Station:
Press the Sync button on the base station.
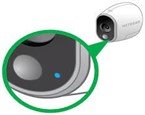
Within a few seconds, The LED on the camera should blink, indicating successful synchronization.
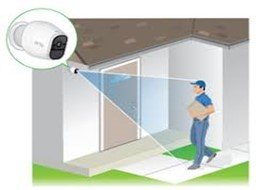
Camera Placement:
Place the camera in the desired location.
Ensure it has a clear line of sight to the area you want to monitor.
Create or Log In to Your Arlo Account:
Download and install the Arlo app on your smartphone or tablet.
Open the Arlo app and create a new Arlo account if you don’t have one. If you already have an account, log in.
Follow the on-screen instructions to add your camera to the account.
Configure Camera Settings:
- Adjust camera settings such as motion detection sensitivity, video quality, and recording preferences through the Arlo app.
- Set up alerts and notifications.
1- Adjust Motion Detection:
Many Arlo cameras have motion detection features. You can adjust the sensitivity of motion detection to avoid false alarms or ensure that all events are captured.
Look for options like “Motion Detection” or “Sensitivity” in the settings.
2- Video Quality:
Adjust the video quality settings to meet your preferences or conserve storage space. Options may include “Video Settings” or “Quality.”
Choose from settings such as High, Optimized, or Low, depending on your priorities.
3- Recording Options:
Configure how your Arlo camera records videos. You may have options for continuous recording, motion-activated recording, or custom schedules.
Check for settings like “Record Video” or “Recording Options.”
4- Audio Settings:
If your Arlo camera has audio capabilities, you might find settings related to audio recording and sensitivity.
Look for options like “Audio Settings” or “Microphone.”
5- Night Vision:
If your Arlo camera has night vision capabilities, you may be able to adjust settings related to night vision mode.
Check for options like “Night Vision” or “Infrared Settings.”
6- Geofencing:
Some Arlo cameras support geofencing, allowing the camera to change its behavior based on your location.
Look for “Geofencing” or similar settings if you want to configure this feature.
7- Activity Zones:
Certain Arlo cameras allow you to define specific areas within the camera’s field of view for more focused motion detection.
Explore options like “Activity Zones” or “Zone Settings.”
Save Changes:
- After making adjustments, save your changes within the app.
Testing:
- Test the camera by triggering motion events or manually recording a video to ensure it captures footage correctly.
- Check the live feed on the Arlo app to verify the camera’s view.
Additional Features:
- Explore additional features like Alerts or Notifications, cloud storage, Arlo Smart plans, and integrations with other smart home devices.
Alerts and Notifications:
Explore settings like “Alerts” or “Notifications” to choose your preferred notification method.
Configure Motion Sensitivity:
Adjust the sensitivity of motion detection based on your preferences. This setting determines how much motion is required to trigger an alert.
Configure Sound Alerts:
If your Arlo camera supports audio alerts, you may have settings related to sound notifications.
Check for options like “Audio Alerts” or “Sound Notifications.”
Arlo Cloud Storage:
| Topic | Arlo Cloud Storage |
|---|---|
| Subscription Plans | Various Arlo Smart Plans offering different storage durations. Additional features may be included based on the chosen plan. |
| Storage Duration | Typically includes storage for a specific duration (e.g., 7 days). |
| Free Cloud Storage | Limited complimentary cloud storage provided with each Arlo camera. Free storage may cover a certain number of days for recordings. |
| Varied Terms | Complimentary storage duration varies based on camera model and terms. |
| Rolling Cloud Storage | Oldest recordings automatically overwritten with new footage. Duration of rolling storage depends on the selected plan. |
Subscription Plan Tiers:
Arlo typically offers different subscription tiers, each with varying levels of cloud storage, video quality, and additional features.
Users can choose a plan based on their storage needs and the desired level of functionality.
Before setting up your Arlo camera, it’s advisable to review the available subscription plans and choose the one that best suits your needs.
This information is subject to change, so it’s recommended to check the latest details and offerings on the official Arlo website or user manual for your specific camera model.
Remote Access:
Cloud storage enables users to access their video recordings remotely through the Arlo app or web portal. This allows you to view, download, or share recorded videos from anywhere with an internet connection.
Security:
Arlo’s cloud storage is designed with security measures to protect your recorded data. This includes encryption protocols and other security features to ensure the privacy and integrity of your footage.
Arlo Smart Features:
Some subscription plans may include additional features such as advanced motion detection, person detection, package detection, and more. These features use cloud processing to enhance the camera’s capabilities.
Continuous Video Recording (CVR):
Some Arlo cameras support Continuous Video Recording, a feature that allows continuous streaming and recording, providing longer-term cloud storage for specific scenarios.
This feature is often available with specific subscription plans.
Save Changes:
After configuring your alert and notification settings, save the changes within the app.
Test Notifications:
Trigger a motion event in front of the camera to test whether you receive the configured notifications. This helps ensure that your settings are working as expected.
FAQs:
1- How long does it take to set up an Arlo camera?
Setting up an Arlo camera typically takes around 15-30 minutes. The process involves unboxing, syncing with the base station, and mounting. However, factors like Wi-Fi connectivity and location selection can influence the setup time.
2- Can I set up multiple Arlo cameras at once?
Yes, you can set up multiple Arlo cameras simultaneously. The Arlo system is designed to support multiple devices, allowing you to enhance your home security by strategically placing cameras in different areas.
3- What Wi-Fi requirements are necessary for Arlo camera setup?
For a smooth Arlo camera setup, ensure a stable Wi-Fi connection with sufficient bandwidth. A minimum upload speed of 2 Mbps is recommended for optimal performance.
Make sure your camera is within a reasonable range of your Wi-Fi router.
4- Do I need a subscription for Arlo camera setup?
While basic Arlo camera functionality is available without a subscription, certain advanced features, such as cloud storage for recorded footage, may require a subscription plan.
Check Arlo’s subscription options to determine the best fit for your needs.
5- Can I monitor my Arlo camera setup remotely?
Yes, you can monitor your Arlo camera setup remotely using the Arlo mobile app.
Once your setup is complete, download the app, log in to your Arlo account, and enjoy real-time access to your camera’s live feed from anywhere with an internet connection.
6- Is professional installation recommended for Arlo cameras?
Arlo cameras are designed for easy self-installation, and professional installation is not necessary. The provided instructions, coupled with the user-friendly Arlo app, make the setup process straightforward for users of all technical levels.
